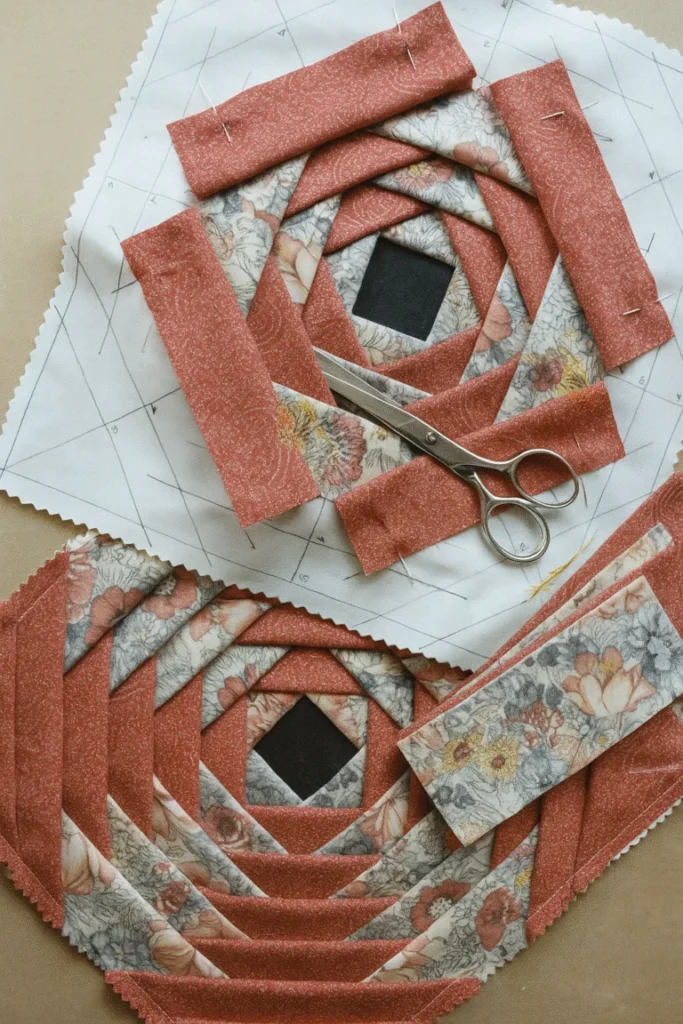
The Best and Most Practical Pineapple Block Pattern

How to Sew a 12.5″ Woven Star Quilt Block is a rewarding project that combines precision piecing with beautiful visual movement, creating a quilt block that looks intricate yet is surprisingly achievable. Whether you are a beginner eager to expand your quilting skills or an experienced quilter searching for a fresh variation on a classic star design, this tutorial-style guide will walk you through every essential detail. By understanding the structure and construction process, you can confidently create a block that measures a perfect 12.5 inches unfinished.
The beauty of the How to Sew a 12.5″ Woven Star Quilt Block technique lies in its woven effect. The interlacing appearance gives depth and dimension to your quilt, making it stand out in any project, from full bed quilts to decorative wall hangings. With careful fabric selection and accurate cutting, you can achieve crisp points and balanced symmetry, which are key elements of a successful woven star block.
In this comprehensive guide, you will learn not only How to Sew a 12.5″ Woven Star Quilt Block, but also how to choose fabrics, cut with precision, assemble components efficiently, and avoid common mistakes. This article is structured to be both human-friendly and optimized for search engines, helping you find exactly what you need while ensuring clarity at every step. Let’s begin with the foundation: understanding the structure and materials required.
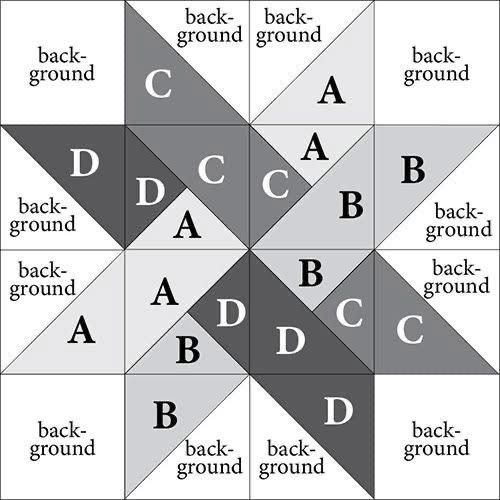
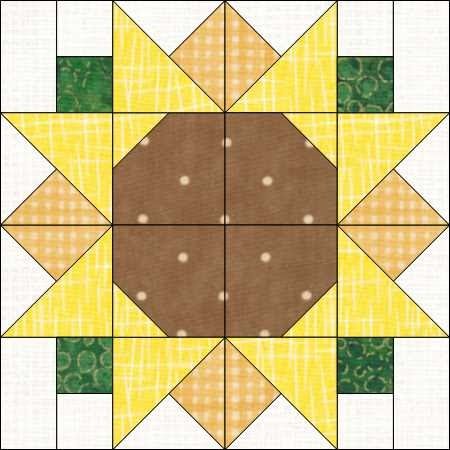
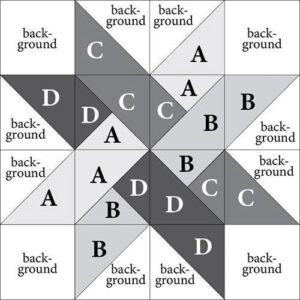
Before diving into How to Sew a 12.5″ Woven Star Quilt Block, it’s essential to understand the block’s layout. The woven star design typically consists of half-square triangles, rectangles, and square units arranged to create a star that appears interlaced. The unfinished size of 12.5 inches will become 12 inches once sewn into a quilt with standard seam allowances.
The structure is based on symmetry. Each quadrant mirrors the others, which makes assembly more manageable. When you break the block into smaller units, the complexity becomes far less intimidating. Visualizing the block in sections allows you to focus on accuracy without feeling overwhelmed.
Fabric contrast plays a critical role in emphasizing the woven effect. Choosing one light fabric, one medium, and one dark fabric can create a striking illusion of overlapping strips. This contrast is what makes the 12.5″ Woven Star Quilt Block visually dynamic and engaging.
Precision cutting is non-negotiable. Since the woven star relies on sharp points meeting perfectly at the center, even a slight trimming error can disrupt the alignment. Using a rotary cutter, quilting ruler, and self-healing mat will significantly improve your results.
Seam allowance consistency is another structural factor. A standard ¼-inch seam allowance ensures your block finishes at the correct size. Testing your seam allowance on scrap fabric before starting is highly recommended.
Understanding the block layout beforehand will make the sewing process smoother. Sketching the arrangement or laying out all pieces on a design wall can help you confirm placement before stitching permanently.
Selecting fabrics for How to Sew a 12.5″ Woven Star Quilt Block is where creativity meets technical precision. Cotton quilting fabric is the best choice because it is stable, easy to press, and holds its shape well. Prewashing is optional but can help prevent shrinkage later.
When choosing colors, think about contrast first and pattern second. High contrast between star points and background enhances the woven illusion. Subtle prints can add texture without overpowering the design, while bold prints should be used thoughtfully.
Accurate cutting begins with properly squared fabric. Align the selvage edges and press the fabric flat before measuring. Any wrinkles or distortions can affect the final dimensions of your pieces.
Measure twice and cut once. For a 12.5-inch unfinished block, you will need precisely measured squares and rectangles according to your chosen pattern specifications. Even a difference of 1/16 inch can impact how the pieces align.
Chain piecing can help maintain consistency. By sewing similar units in sequence without cutting threads in between, you reduce fabric shifting and save time. This technique is especially useful when assembling half-square triangles.
After cutting and piecing smaller units, trimming them to exact measurements ensures uniformity. Using a square ruler to trim half-square triangles will help maintain sharp star points and keep your Woven Star Quilt Block perfectly sized.
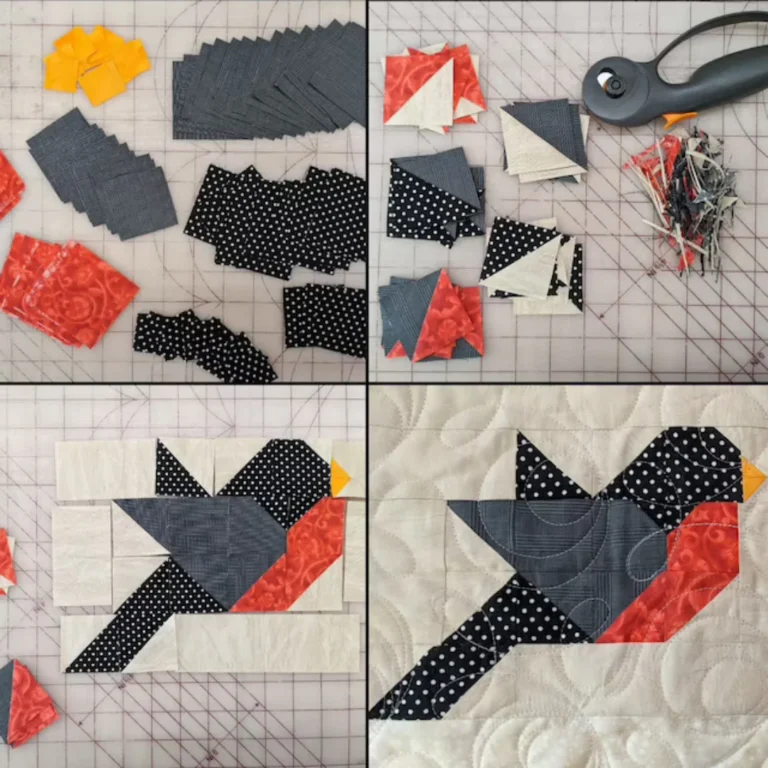
Now that your pieces are ready, it’s time to focus on How to Sew a 12.5″ Woven Star Quilt Block step by step. Begin by constructing the smaller units, typically half-square triangles or strip units, depending on your pattern variation.
Pressing direction matters more than many quilters realize. Press seams toward the darker fabric to prevent shadowing. Proper pressing also helps seams nest together neatly, improving accuracy at intersections.
Once smaller components are complete, assemble them into rows. Keeping pieces aligned at the corners ensures the woven effect remains consistent throughout the block. Pinning at seam intersections can greatly improve precision.
Sew rows together carefully, maintaining your ¼-inch seam allowance. Avoid pulling or stretching the fabric as it feeds through the machine. Let the feed dogs guide the fabric naturally.
After assembling the full block, measure it. The unfinished block should measure 12.5 inches square. If it is slightly larger, trim carefully; if smaller, evaluate your seam allowance for adjustments in future blocks.
A final press will give your block a polished appearance. Steam lightly and avoid excessive movement of the iron to prevent distortion. At this stage, your 12.5″ Woven Star Quilt Block should display crisp points and balanced proportions.
Mastering How to Sew a 12.5″ Woven Star Quilt Block takes practice, but a few expert tips can significantly improve your results. First, always test your seam allowance before starting a full block. Small calibration adjustments can prevent sizing issues later.
Using starch or fabric spray can stabilize fabric, especially if working with softer cotton. This helps maintain sharp edges and prevents stretching during sewing.
A design wall is incredibly useful. Laying out all components before sewing allows you to confirm orientation and color placement, avoiding costly mistakes.
If your star points do not align perfectly at the center, consider trimming slightly and resewing that seam. Precision often comes from small corrections rather than major adjustments.
Keeping your rotary blade sharp is another overlooked tip. A dull blade can create uneven edges, which affect accuracy throughout the block.
Finally, patience is key. The woven effect depends on alignment and contrast. Taking your time ensures your How to Sew a 12.5″ Woven Star Quilt Block project turns out beautifully every time.
What does 12.5 inches unfinished mean in quilting?
A 12.5-inch unfinished block will measure 12 inches once sewn into a quilt. The extra half inch accounts for the ¼-inch seam allowance on all sides.
Is the Woven Star Quilt Block suitable for beginners?
Yes, beginners can successfully learn How to Sew a 12.5″ Woven Star Quilt Block by focusing on accurate cutting and seam consistency. Breaking the block into smaller units simplifies the process.
What fabrics work best for a woven star effect?
High-quality quilting cotton with strong contrast between colors works best. Combining light, medium, and dark fabrics enhances the woven illusion.
How do I ensure my star points are sharp?
Precision cutting, consistent ¼-inch seams, and careful trimming of half-square triangles are essential for sharp star points.
Why is my block smaller than 12.5 inches?
The most common reason is a seam allowance slightly larger than ¼ inch. Test your seam allowance using scrap fabric before starting a new block.
Can I resize the Woven Star Quilt Block?
Yes, but resizing requires recalculating all component measurements proportionally. It is recommended to master the 12.5-inch version first.
Should I press seams open or to one side?
Pressing to one side is generally preferred for strength and nesting seams, especially when constructing a Woven Star Quilt Block.
How many blocks do I need for a full quilt?
The number depends on the desired quilt size. For example, a throw quilt may require 12 to 20 blocks, while a queen-size quilt will require significantly more.
Learning How to Sew a 12.5″ Woven Star Quilt Block opens the door to creating stunning quilts filled with dimension and movement. Throughout this guide, we explored the block’s structure, fabric selection strategies, precision cutting methods, and step-by-step assembly techniques. By focusing on accuracy, contrast, and consistent seam allowances, you can achieve a professional-looking woven star design.
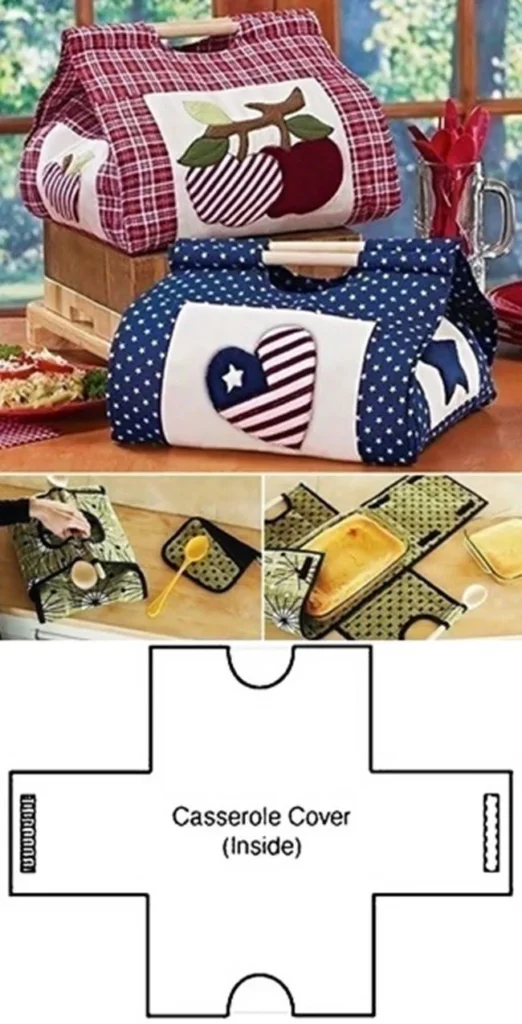
With practice and patience, this classic yet dynamic quilt block becomes easier and more enjoyable to create. Whether you incorporate it into a full quilt, a pillow cover, or a decorative wall piece, the woven star pattern brings timeless charm to any project.
I hope this detailed tutorial has helped you feel confident about starting your own 12.5″ Woven Star Quilt Block. Please leave your honest opinion and share any suggestions or tips from your experience. Your feedback and creative ideas are always welcome!