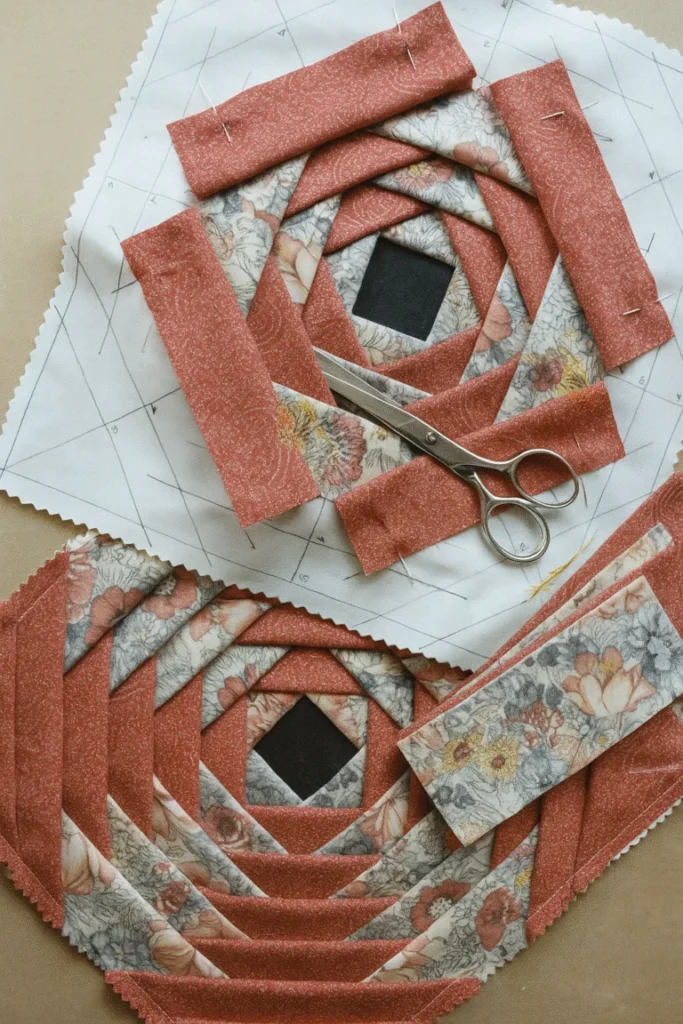
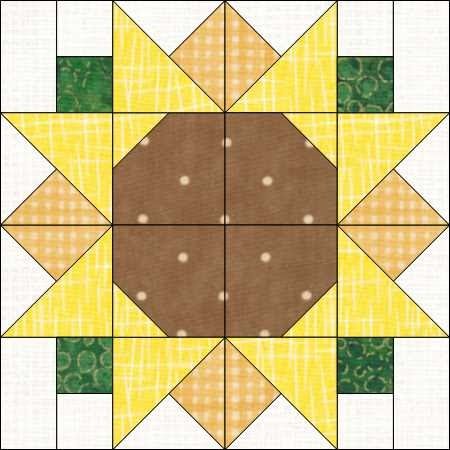
The Best and Most Practical Pineapple Block Pattern

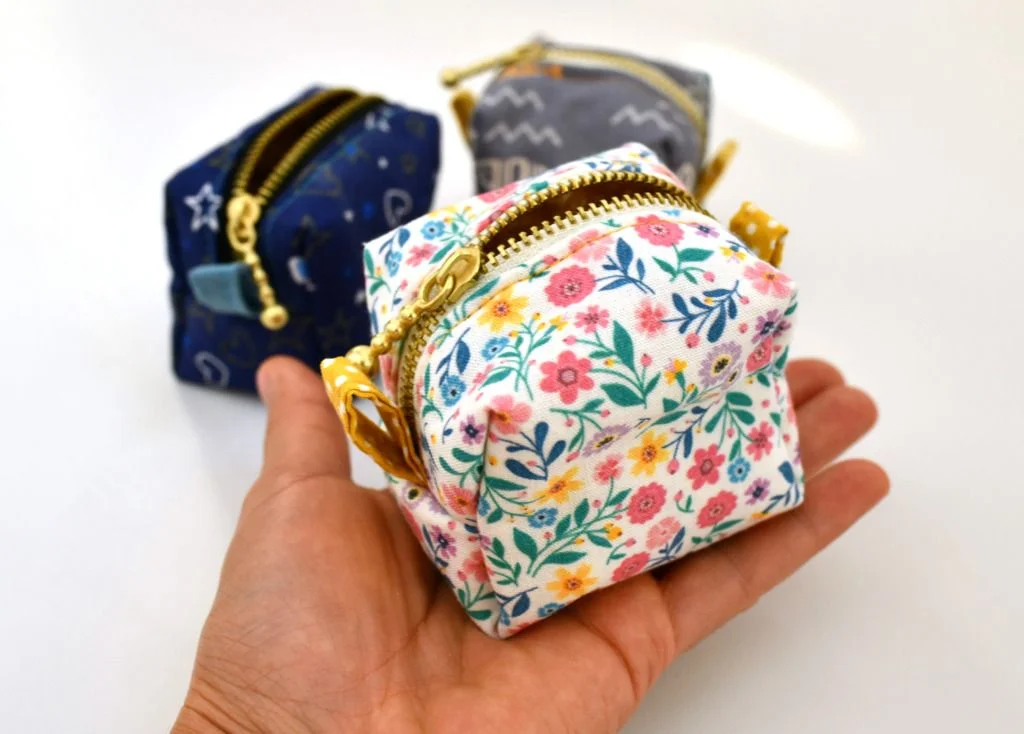
How to sew a mini zipper bag is a question many beginners and experienced crafters ask when they want to create something practical, stylish, and easy to sell or gift. Learning how to sew a mini zipper bag opens the door to countless creative possibilities, from personalized coin pouches to elegant small organizers for daily essentials. This project is simple enough for beginners yet flexible enough for advanced sewists who enjoy adding their own unique touch.
In today’s world of handmade creativity, small accessories are highly popular. A mini zipper bag can be used to store coins, earbuds, makeup, keys, or small sewing supplies. Because it requires minimal fabric and time, it’s also a fantastic project for those who want quick results without sacrificing quality. Understanding how to sew a mini zipper bag step by step ensures a clean, professional finish.
This complete guide will teach you how to sew a mini zipper bag in a structured and easy-to-follow way. You will learn about materials, preparation, stitching techniques, zipper installation, finishing touches, and practical tips. By the end, you’ll feel confident enough to create multiple versions and even customize your own designs.
Before learning how to sew a mini zipper bag, it’s important to gather the right materials. Choosing quality supplies makes a big difference in the final result and durability of your bag.
First, you will need fabric. Cotton fabric is highly recommended for beginners because it’s stable and easy to sew. You’ll need an outer fabric and a lining fabric. Quilting cotton works perfectly for a mini zipper bag.
Next, you need a zipper. A 6 to 8-inch zipper is ideal for most small pouches. Make sure the zipper matches or complements your fabric. Nylon zippers are beginner-friendly because they are easier to sew over than metal ones.
You will also need interfacing. Lightweight fusible interfacing helps give structure to your bag. It prevents the fabric from collapsing and gives your mini zipper bag a professional appearance.
Basic sewing tools are essential. These include scissors or a rotary cutter, pins or clips, a ruler, tailor’s chalk or fabric marker, and a sewing machine. While hand sewing is possible, a sewing machine makes the process much faster and cleaner.
Finally, prepare matching thread and an iron. Pressing your seams at each step is crucial when learning how to sew a mini zipper bag. Proper pressing ensures crisp edges and improves overall quality.
The next step in mastering how to sew a mini zipper bag is cutting and preparing your fabric correctly. Precision at this stage guarantees symmetry and clean assembly.
Start by cutting two rectangles for the outer fabric and two for the lining. A common beginner size is 8 x 5 inches. You can adjust these measurements depending on how large or small you want your mini zipper bag.
After cutting the fabric pieces, cut two pieces of interfacing in the same size as your outer fabric. Fuse the interfacing to the wrong side of the outer pieces using an iron. Follow the manufacturer’s instructions for best results.
Make sure all pieces are aligned evenly. Trim any uneven edges. Accuracy in cutting helps your zipper line up perfectly later in the project.
Once everything is fused and trimmed, place one outer fabric piece right side up. Then position the zipper face down along the top edge. Place one lining piece face down on top, creating a sandwich with the zipper in the middle.
Pin or clip everything in place. This layered setup is one of the most important steps in learning how to sew a mini zipper bag, as it ensures a clean zipper finish.
Now comes the most exciting part of how to sew a mini zipper bag: attaching the zipper and assembling the pouch. Take your time with this step to ensure a smooth result.
Using a zipper foot on your sewing machine, sew along the top edge, securing the fabric and zipper together. Sew slowly and carefully to maintain a straight line.
After sewing, flip the fabric pieces right side out and press the seam flat. Topstitch close to the zipper edge. This prevents the fabric from getting caught in the zipper and gives your mini zipper bag a polished look.
Repeat the same process on the other side of the zipper with the remaining outer and lining pieces. Again, sew, flip, press, and topstitch for a clean finish.
Once both sides are attached, open the zipper halfway. This is extremely important because it allows you to turn the bag right side out later.
Place the outer pieces right sides together and the lining pieces right sides together. Sew around the edges, leaving a small opening at the bottom of the lining for turning. Trim corners carefully to reduce bulk.
The final stage of how to sew a mini zipper bag involves turning, closing, and adding optional details. This is where your project truly comes to life.
Turn the bag right side out through the opening in the lining. Gently push out the corners using a blunt tool, being careful not to tear the fabric.
Sew the opening in the lining closed. You can use a ladder stitch by hand or sew close to the edge with your machine. Then push the lining inside the outer fabric.
Press the entire bag carefully. Proper pressing enhances the structure and makes your mini zipper bag look professionally made.
At this stage, you can add creative details. Consider adding a small fabric tab on the side for easier zipper pulling. You can also sew decorative labels or patches.
For added durability, reinforce the zipper ends with a few extra stitches. This prevents strain when opening and closing the pouch frequently.
Once completed, test the zipper several times. Congratulations — you now know how to sew a mini zipper bag from start to finish.
What is the best fabric for a mini zipper bag?
Cotton fabric is ideal for beginners because it is stable and easy to handle. Canvas and lightweight denim are also good choices for a sturdier finish.
Do I need a zipper foot to sew a mini zipper bag?
While not absolutely mandatory, a zipper foot makes sewing close to the zipper teeth much easier and cleaner.
Can beginners learn how to sew a mini zipper bag?
Yes. This project is beginner-friendly. It requires basic straight stitching and simple construction techniques.
Why is my zipper wavy after sewing?
A wavy zipper often happens when fabric stretches during stitching. Using interfacing and pressing carefully helps prevent this issue.
How long does it take to sew a mini zipper bag?
For beginners, it may take about 45 to 60 minutes. With practice, you can complete one in 20 to 30 minutes.
Can I wash a mini zipper bag?
Yes, if made with washable fabrics like cotton. It’s recommended to air dry to maintain shape and zipper quality.
Learning how to sew a mini zipper bag is a rewarding and practical skill. In this article, you discovered the necessary materials, proper fabric preparation, zipper installation techniques, and finishing steps. By following each stage carefully, you can create a durable, stylish, and functional mini zipper bag suitable for personal use, gifts, or even small business sales.
The beauty of mastering how to sew a mini zipper bag lies in its versatility. You can experiment with different fabrics, colors, sizes, and decorative elements to make each bag unique. With practice, your sewing speed and confidence will grow significantly.
Now that you understand how to sew a mini zipper bag, I would love to hear your honest opinion. Did you find this guide helpful? Do you have suggestions or creative ideas to improve this project? Share your thoughts and let your creativity continue to grow.


