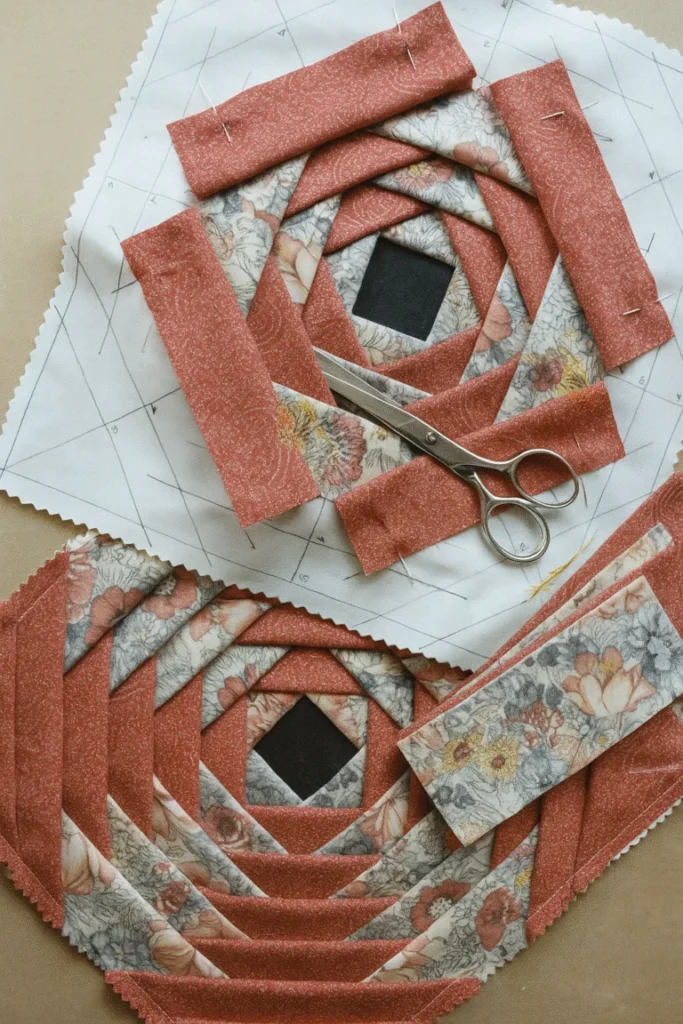
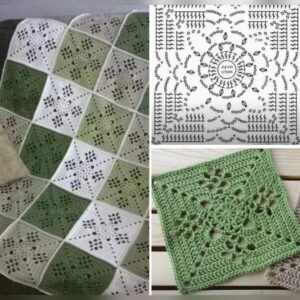
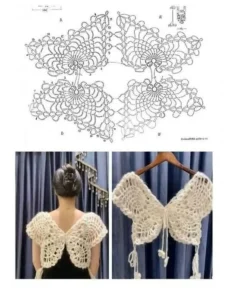
The Best and Most Practical Pineapple Block Pattern

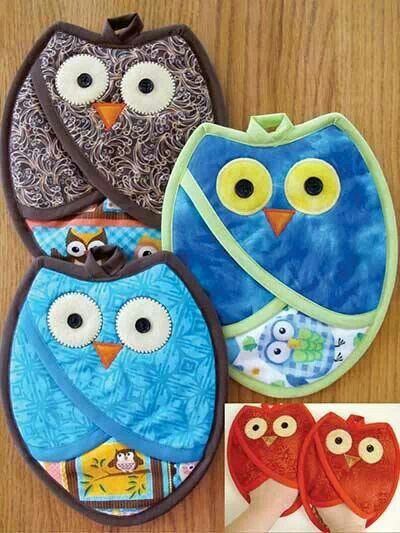
Sewing instructions Sew owl potholders is the perfect starting point for anyone who loves combining creativity with practical kitchen crafts. If you enjoy handmade projects that are both decorative and functional, learning how to sew owl-shaped potholders can be a rewarding and relaxing experience. These charming kitchen accessories add personality to your cooking space while also protecting your hands from heat. In this complete guide, you will discover detailed steps, essential materials, and expert tips to help you create beautiful and durable owl potholders from scratch.
When people search for Sewing instructions Sew owl potholders, they are often looking for clear, beginner-friendly guidance that makes the sewing process simple and enjoyable. Whether you are new to sewing or already have some experience, this project is ideal because it allows you to practice basic techniques such as cutting fabric, layering batting, stitching curves, and adding decorative elements. At the same time, the owl design gives you the freedom to experiment with colors, patterns, and textures.
Another reason why Sewing instructions Sew owl potholders is such a popular topic is that handmade potholders make thoughtful gifts. They are perfect for housewarmings, birthdays, holidays, or even as items to sell at craft fairs. With the right materials and careful construction, your owl potholders will not only look adorable but will also be heat-resistant, durable, and easy to wash. Let’s dive into the step-by-step process and learn how to bring your owl potholder to life.
Before starting your Sewing instructions Sew owl potholders project, it is important to gather all necessary materials. You will need cotton fabric for the outer layer, heat-resistant batting or insulated lining for the inside, matching thread, scissors, pins, and a sewing machine. Cotton is highly recommended because it can withstand high temperatures better than synthetic fabrics.
Choosing the right fabric design plays a significant role in the final appearance of your owl potholder. You can select playful prints for the wings and body or opt for solid colors that highlight the owl’s eyes and beak. Mixing contrasting fabrics will make the owl’s features stand out more clearly and create a visually appealing result.
Heat-resistant batting is essential for safety. When following Sewing instructions Sew owl potholders, always use insulated batting specifically designed for potholders. This special material helps block heat and protects your hands when handling hot pots and pans. Never skip this step, as regular batting alone may not provide sufficient insulation.
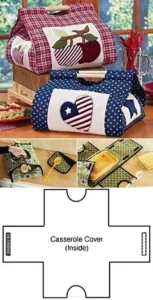
Next, prepare your pattern. You can draw a simple owl shape on paper, including the body, wings, eyes, and beak. Make sure the size is practical for kitchen use, typically between 7 and 9 inches tall. Cut out the pattern pieces carefully, as accuracy will make sewing easier later.
Once your pattern is ready, place it on the fabric and trace around it with tailor’s chalk or a washable marker. Cut two identical owl body pieces from cotton fabric and one or two pieces from insulated batting. Precision at this stage ensures that all layers align correctly during sewing.
Before moving to the sewing machine, iron your fabric pieces. Smooth fabric is much easier to handle and results in cleaner seams. Proper preparation sets the foundation for successful Sewing instructions Sew owl potholders, ensuring your project looks professional and polished.
Now that your materials are ready, it’s time to begin the sewing process. Start by layering the pieces: place one cotton owl body piece right side down, then add the insulated batting on top, and finally position the second cotton piece right side up. This sandwich structure creates the padded effect needed for a potholder.
Pin all layers together to prevent shifting while sewing. When following Sewing instructions Sew owl potholders, secure pinning is crucial because curved edges can easily move out of alignment. Take your time with this step to avoid uneven stitching later.
Using your sewing machine, stitch around the edges of the owl shape with a ¼-inch seam allowance. Leave a small opening at the bottom so you can turn the potholder right side out. Sew slowly around curves to maintain smooth lines and avoid puckering.
After stitching, carefully trim excess fabric around the edges without cutting into the seam. This helps reduce bulk and allows the owl shape to look crisp once turned. Clip small notches around curved areas to help the fabric lay flat.
Turn the potholder right side out through the opening. Gently push out the curves using a blunt tool such as a wooden stick. Make sure all edges are fully shaped before pressing the potholder with an iron.
Close the opening with a neat topstitch close to the edge. For added durability, you can quilt the potholder by sewing decorative lines across the body. Quilting not only enhances the look but also keeps the insulated batting securely in place, completing your Sewing instructions Sew owl potholders project structure.
One of the most enjoyable parts of Sewing instructions Sew owl potholders is decorating your owl. Start with the eyes, which are the most distinctive feature. Cut circles from contrasting fabric and sew them onto the front of the owl using a zigzag or satin stitch.
For the beak, use a small triangle piece of fabric in a bright color such as orange or yellow. Position it between the eyes and stitch securely. The beak adds personality and brings your owl design to life.
Wings can be sewn separately and attached to the front or stitched into the side seams during construction. Layering different fabric prints for the wings adds depth and character to your potholder design.
You may also add embroidery details such as eyelashes, feathers, or decorative stitching around the edges. Hand embroidery can give your owl a unique, handcrafted charm that makes each piece one of a kind.
If you plan to hang your potholder, sew a small fabric loop at the top. Use a folded strip of cotton fabric and insert it into the seam before closing the top edge. This practical addition makes storage easier and keeps your kitchen organized.
Creative embellishments are what make Sewing instructions Sew owl potholders truly special. However, always ensure that decorations are securely attached and made from heat-safe materials to maintain functionality and safety.
When following Sewing instructions Sew owl potholders, durability should be a top priority. Use high-quality cotton thread and reinforce seams with backstitching at the beginning and end of each seam. Strong stitching ensures your potholder lasts through frequent use.
Wash your fabric before sewing to prevent shrinking later. Pre-washing also removes any chemical residues and helps the finished potholder maintain its shape after laundering.
Always test your finished potholder with moderate heat before regular use. Hold a warm (not extremely hot) pot briefly to check the insulation level. If the heat transfers too quickly, consider adding an extra layer of insulated batting.
Keep your stitches even and consistent. Professional-looking results come from patience and attention to detail. If necessary, practice sewing curves on scrap fabric before working on your final owl shape.
For gifting or selling, present your owl potholders neatly pressed and packaged. Attractive presentation enhances perceived value and showcases the care put into following Sewing instructions Sew owl potholders.
Finally, maintain safety standards by avoiding synthetic decorations that could melt. Stick to cotton fabrics and heat-resistant materials to ensure your handmade kitchen accessory is both beautiful and safe.
What fabric is best for Sew owl potholders?
Cotton fabric is the best choice because it is heat-resistant, durable, and easy to sew. Avoid synthetic fabrics that may melt under high temperatures.
Do I need special batting for potholders?
Yes, insulated or heat-resistant batting is strongly recommended. Regular batting alone may not provide adequate protection from heat.
Can beginners follow Sewing instructions Sew owl potholders?
Absolutely. This project uses basic sewing techniques, making it suitable for beginners who are comfortable with a sewing machine.
How do I make my owl potholder thicker?
You can add an extra layer of insulated batting or quilt multiple layers together to increase thickness and heat protection.
How should I wash owl potholders?
Machine wash in cold or warm water and air dry or tumble dry on low. Pre-washing fabrics before sewing helps maintain shape after cleaning.
Can I sell potholders made using Sewing instructions Sew owl potholders?
Yes, handmade potholders are popular at craft fairs and online marketplaces. Ensure high-quality stitching and safe materials for best results.
In this complete guide to Sewing instructions Sew owl potholders, you learned how to choose materials, prepare patterns, sew layered fabric pieces, and add decorative details for a charming and functional kitchen accessory. By following step-by-step instructions and focusing on safety and durability, you can create owl potholders that are both practical and visually delightful.
Now that you understand the full process of Sewing instructions Sew owl potholders, it’s time to start your own project. Sewing is a skill that improves with practice, and each owl you make will become more refined and unique. I would love to hear your honest opinion about this guide and any suggestions you may have. Feel free to share your experience and creative ideas!
