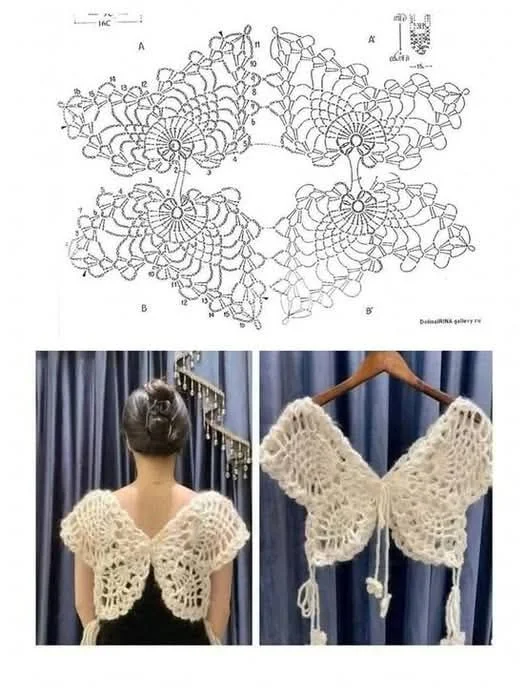
How to Make a Beautiful Butterfly Cropped Top in Crochet

Granny Square Tutorial is one of the most searched and beloved topics in the world of crochet, and for good reason. This classic technique has stood the test of time, charming generations of crafters with its versatility, beauty, and simplicity. Whether you are a complete beginner or an experienced crocheter looking to refine your skills, learning the fundamentals of a Granny Square Tutorial can open the door to countless creative possibilities. From cozy blankets to modern fashion pieces, the humble granny square continues to inspire handmade projects across the globe.
At its heart, the granny square represents tradition, creativity, and comfort. It is often the very first pattern new crocheters learn because it introduces essential stitches in a repetitive and manageable way. At the same time, experienced artisans continue to revisit the granny square for its adaptability and endless design variations. A well-structured Granny Square Tutorial not only teaches technique but also builds confidence, helping crafters understand tension, stitch placement, and color changes with clarity.
In today’s crafting world, the granny square has evolved beyond vintage afghans. Designers now incorporate bold colors, modern palettes, and innovative layouts into their work. Following a comprehensive Granny Square Tutorial allows you to master the basics while also exploring creative expansions. In this article, you will discover step-by-step guidance, essential materials, design tips, and expert advice to help you confidently create beautiful granny squares and transform them into stunning finished projects.
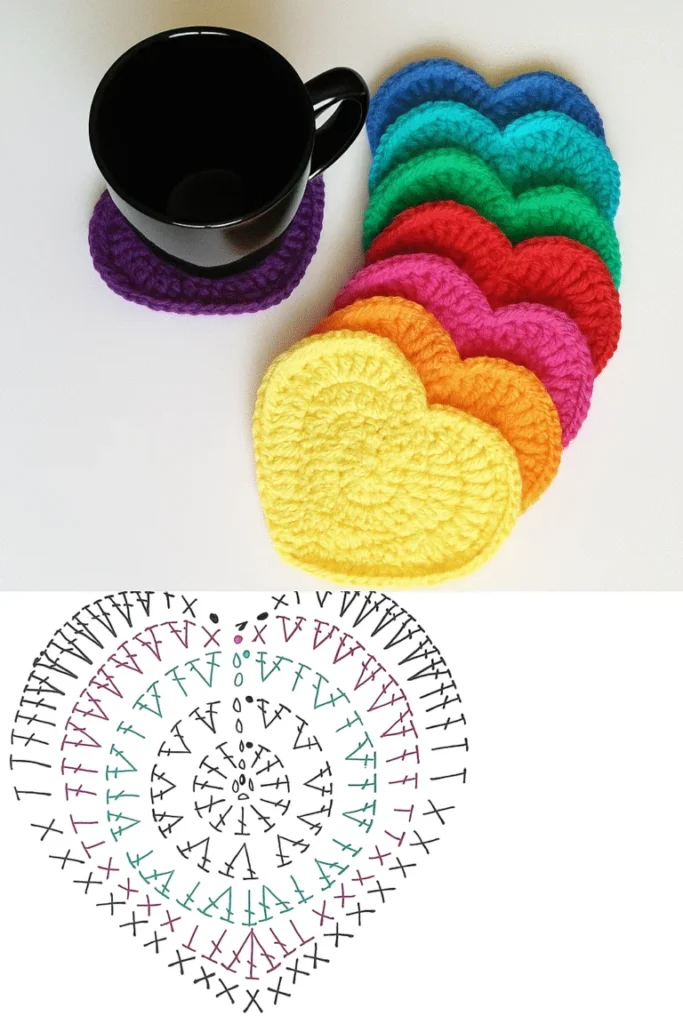
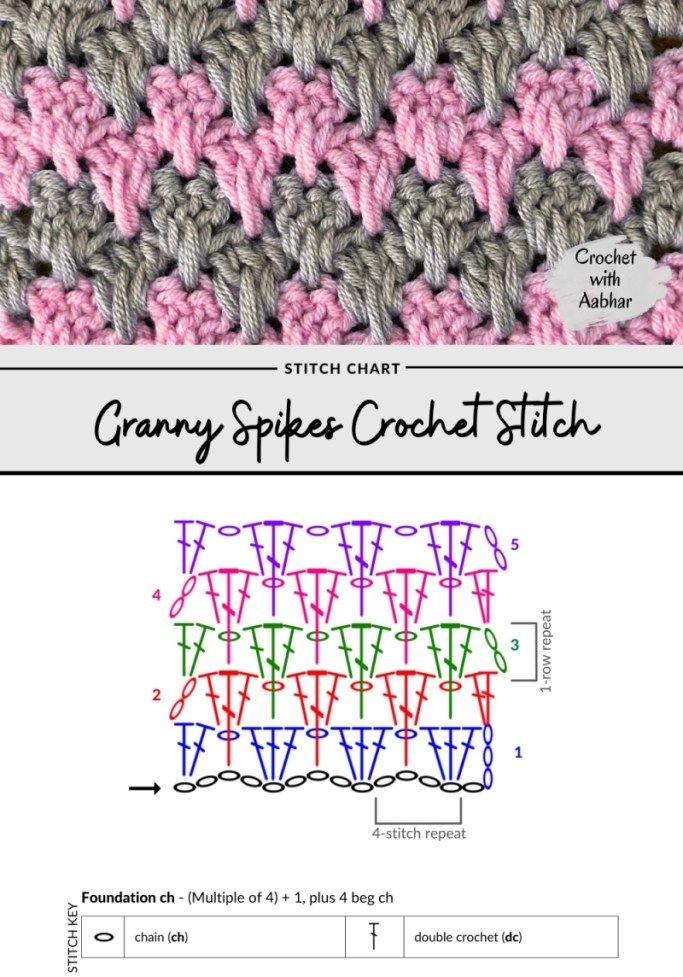
The foundation of any successful Granny Square Tutorial begins with understanding the basic stitches involved. Traditionally, granny squares are made using chain stitches and double crochet stitches. These stitches create the signature clusters that give the square its open, airy texture. Learning how these stitches work together is the first step toward mastering the pattern.
A classic granny square typically starts with a small loop in the center, often created using a magic ring or a chain loop. From there, clusters of double crochet stitches are worked into the center to form the first round. This round establishes the shape and structure that subsequent rounds will build upon. A detailed Granny Square Tutorial will carefully explain how to maintain even tension during this stage.
As you continue building outward, corners are formed by chaining stitches between clusters. These corner spaces are what give the granny square its defined shape. Understanding how to properly space these chains ensures that your square lies flat rather than curling or puckering. A reliable Granny Square Tutorial emphasizes the importance of counting stitches to maintain symmetry.
Color changes are another hallmark of granny squares. Many tutorials demonstrate how to switch yarn colors at the beginning of a new round for a vibrant, layered look. This simple technique can dramatically transform the final design. Following a structured Granny Square Tutorial helps you learn seamless color transitions.
Consistency is key when working through multiple rounds. Each round builds upon the previous one, so proper stitch placement matters. Paying attention to stitch counts and corner placements ensures uniform growth. A thorough Granny Square Tutorial reinforces these principles with clear instructions.
Finally, fastening off and weaving in ends completes the square. While this may seem like a minor detail, clean finishing techniques elevate the overall quality of your project. A complete Granny Square Tutorial will guide you through this final step to achieve professional-looking results.
Before beginning your Granny Square Tutorial, selecting the right materials makes a significant difference in your experience. The most common yarn choice for beginners is medium-weight acrylic yarn. It is affordable, durable, and easy to work with. Cotton yarn is another excellent option, especially for projects like bags or garments.
Choosing the correct crochet hook size is equally important. Most yarn labels recommend a hook size, and following that suggestion helps maintain proper tension. For beginners following a Granny Square Tutorial, a 5.0 mm (H-8) hook paired with worsted-weight yarn is a popular starting combination.
Scissors and a yarn needle are essential tools for finishing your granny square. After completing your square, you will need to cut the yarn and weave in loose ends. A quality yarn needle makes this process smoother and ensures your finished piece remains secure. Every practical Granny Square Tutorial highlights the importance of these finishing tools.
Stitch markers can also be helpful, especially when working larger squares. They assist in identifying corner spaces or the beginning of rounds. While not mandatory, they can improve accuracy and reduce mistakes. Many advanced versions of a Granny Square Tutorial suggest using markers for more complex variations.
Comfort should not be overlooked. Good lighting and a comfortable seating position make longer crochet sessions enjoyable. Proper ergonomics reduce strain on your hands and wrists, allowing you to focus fully on your Granny Square Tutorial practice.
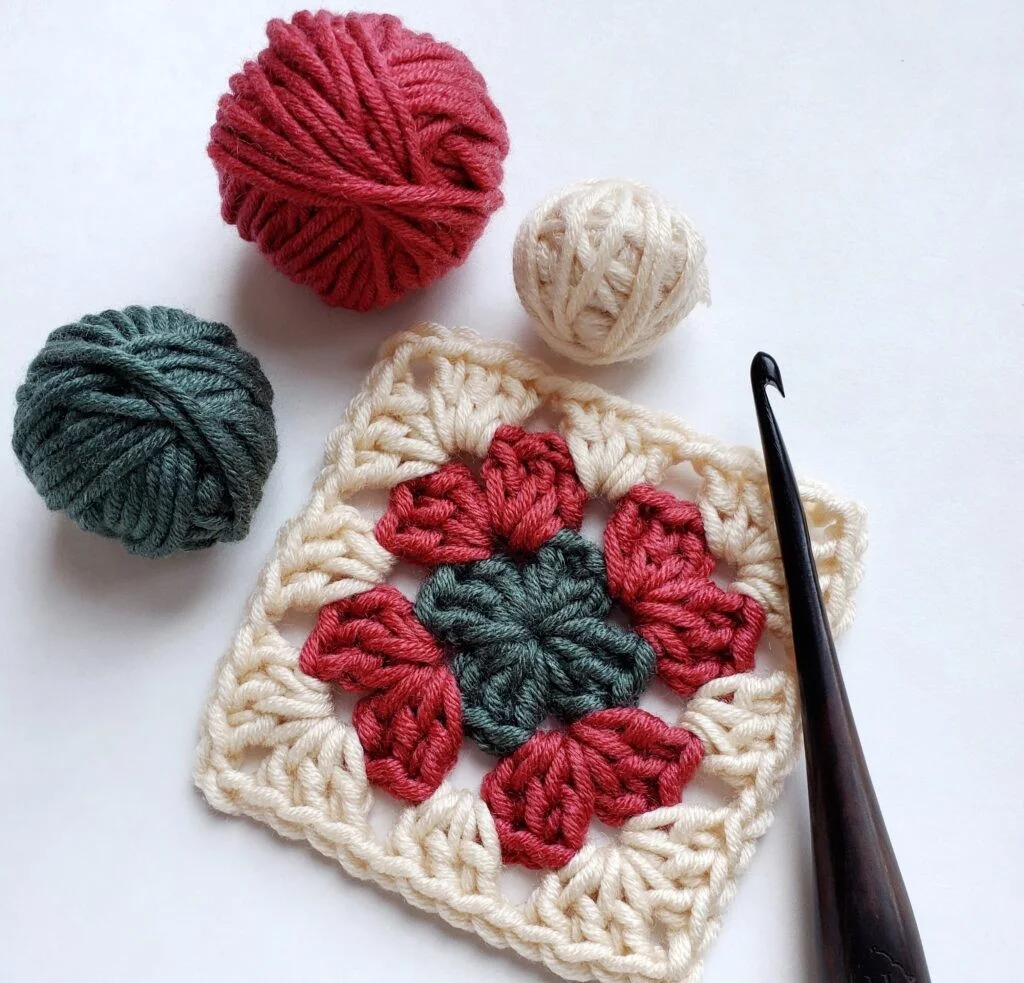
Lastly, selecting a color palette is part of the creative process. Traditional granny squares often feature bright, contrasting colors, but modern interpretations may use neutral or monochromatic schemes. Planning your colors before starting your Granny Square Tutorial ensures a cohesive final result.
The first step in any Granny Square Tutorial is creating the center ring. This can be done using a magic circle or by chaining four stitches and joining them into a loop. Both methods are effective, and beginners can choose whichever feels more comfortable.
Next, you will chain three stitches to represent the first double crochet of the round. Then, work two additional double crochet stitches into the center ring to form your first cluster. A detailed Granny Square Tutorial will explain how this cluster forms the building block of the entire square.
After the first cluster, chain two stitches to create a corner space. Repeat the process of working three double crochet stitches into the ring, followed by two chains. Continue until you have four clusters separated by chain spaces. This completes the first round of your Granny Square Tutorial.
To begin the second round, slip stitch into the nearest corner space. Chain three stitches and work two double crochet stitches to form the first cluster. In each corner space, you will work three double crochets, chain two, and then three more double crochets. This structure expands the square evenly.
As you progress through additional rounds, continue working clusters into the side spaces and corners. Each round increases the size of the square while maintaining its shape. A well-written Granny Square Tutorial will remind you to keep consistent tension throughout.
Once your square reaches the desired size, finish the final round and fasten off the yarn. Weave in all loose ends securely. Blocking the square gently can help improve its shape and definition, completing your Granny Square Tutorial successfully.
One of the most exciting aspects of a Granny Square Tutorial is exploring creative variations. While the traditional pattern uses basic double crochet clusters, countless modifications exist. Changing stitch types can add texture and dimension to your square.
Solid granny squares are a popular variation. Instead of open chain spaces between clusters, additional stitches fill the gaps, creating a denser fabric. This version is ideal for garments or projects requiring less airflow. Many modern Granny Square Tutorial guides include instructions for this variation.
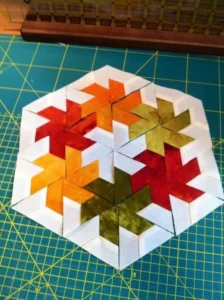
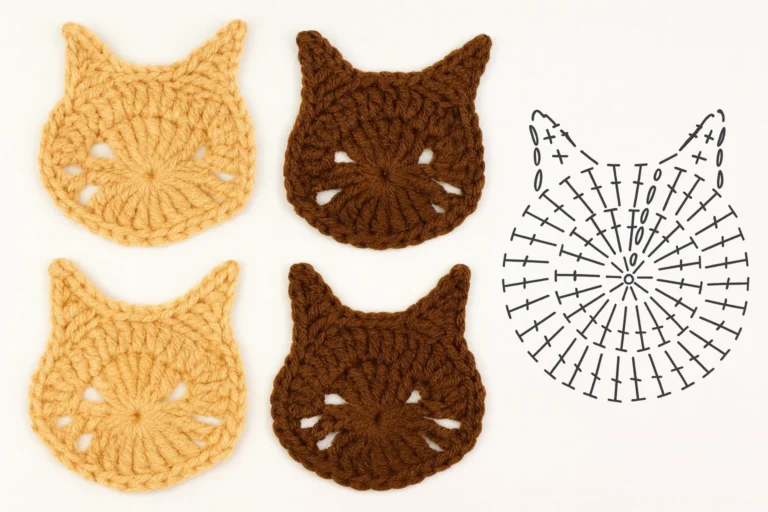
Another variation involves using different shapes. Hexagons, triangles, and circles can all be adapted from the granny square concept. These geometric alternatives add visual interest and can be combined in unique layouts. Advanced crocheters often expand their Granny Square Tutorial knowledge by experimenting with these shapes.
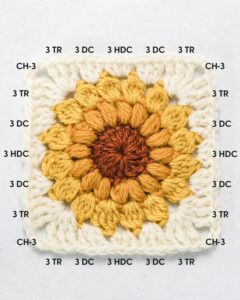
Incorporating textured stitches such as puff stitches or bobbles creates intricate designs. These elements add depth and visual appeal. While slightly more advanced, a detailed Granny Square Tutorial can break down these stitches into manageable steps.
Joining techniques also offer creative flexibility. Squares can be sewn together, slip-stitched, or joined-as-you-go. Each method produces a different look and feel. Learning multiple joining methods enhances the versatility of your Granny Square Tutorial experience.
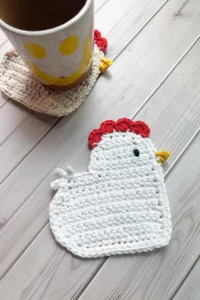
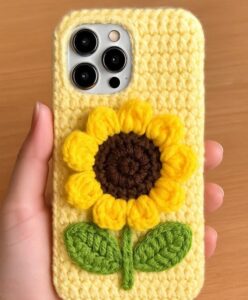
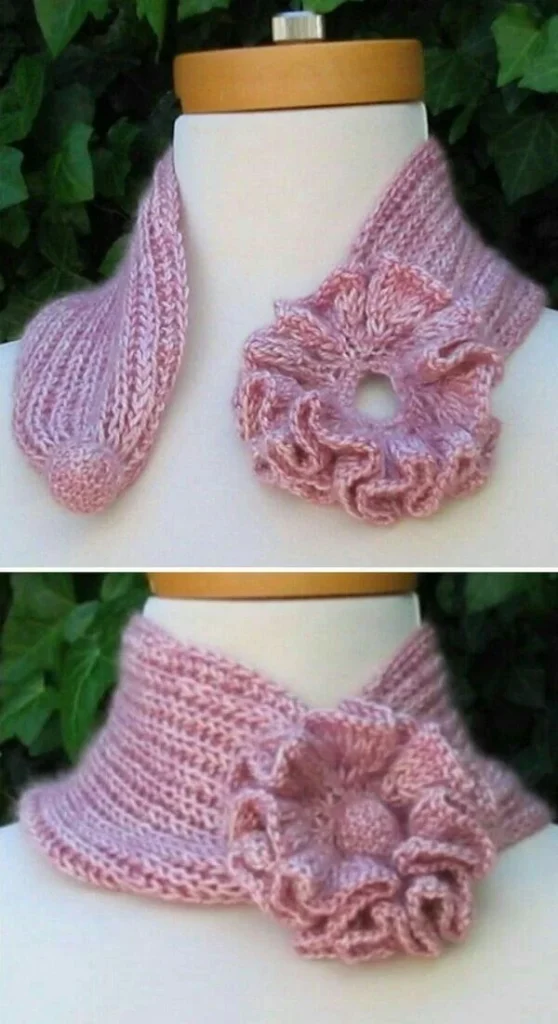
Finally, granny squares can be transformed into a wide range of finished items. Blankets, scarves, cardigans, bags, and even home décor pieces can all begin with a simple square. A comprehensive Granny Square Tutorial empowers you to turn small motifs into impressive handmade creations.
What is a Granny Square Tutorial best suited for?
A Granny Square Tutorial is perfect for beginners learning crochet basics and for experienced crafters seeking versatile design options. It introduces essential stitches while allowing room for creativity.
How long does it take to complete a granny square?
The time varies depending on skill level and square size. Beginners may take 20 to 40 minutes for a small square, while experienced crocheters can complete one in under 15 minutes.
What yarn is best for a Granny Square Tutorial?
Medium-weight acrylic yarn is ideal for beginners due to its affordability and ease of use. Cotton yarn is excellent for durable items like bags or garments.
Why is my granny square curling?
Curling usually occurs due to tight tension or incorrect stitch counts. Following a detailed Granny Square Tutorial and carefully counting stitches can resolve this issue.
How do I join multiple granny squares together?
Squares can be joined using slip stitch, single crochet, or sewing with a yarn needle. The choice depends on the desired appearance and project type.
Can I wash granny square projects in a machine?
Most acrylic yarn projects are machine washable, but always check the yarn label. Cotton projects may also be machine washed, depending on care instructions.
Is blocking necessary after finishing a granny square?
Blocking is optional but recommended for a polished look. It helps even out stitches and ensures consistent square shapes.
Can beginners really follow a Granny Square Tutorial successfully?
Yes, absolutely. With clear instructions and patience, beginners can quickly grasp the repetitive pattern and build confidence through practice.
In this comprehensive Granny Square Tutorial, we explored the essential stitches, materials, step-by-step process, and creative variations that make granny squares a timeless crochet favorite. From understanding foundational techniques to experimenting with textures and color changes, mastering the granny square opens the door to endless creative possibilities. By practicing consistency, maintaining proper tension, and exploring new variations, you can transform simple squares into beautiful handmade pieces.
Now it’s your turn to pick up your hook and yarn and begin your own Granny Square Tutorial journey. I would love to hear your honest opinion about this guide.
Did it help you feel more confident about starting your project? Do you have suggestions or creative ideas to share? Leave your sincere feedback and let’s continue growing together in the wonderful world of crochet.


