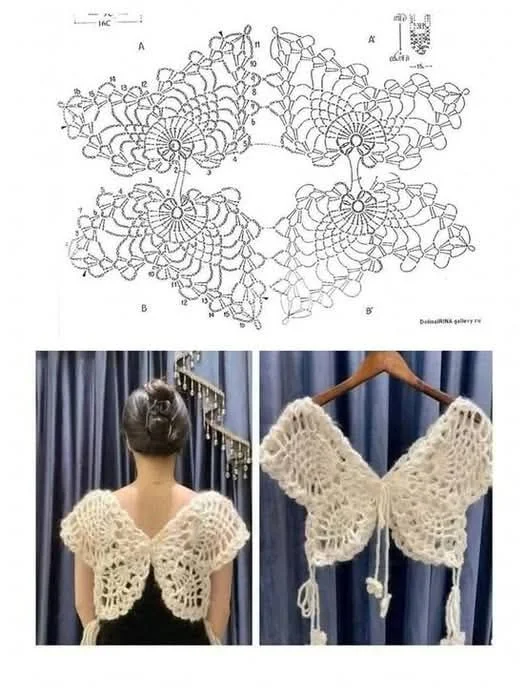
How to Make a Beautiful Butterfly Cropped Top in Crochet

Crocheted kitten face step-by-step is a delightful crochet project that combines creativity, relaxation, and handmade charm. Whether you are a beginner exploring the world of crochet or an experienced crafter looking for a cute and quick project, learning a crocheted kitten face step-by-step can bring joy to your crafting routine. This adorable design can be used in many ways, such as appliqués for blankets, decorations for baby clothes, or even as part of handmade gifts.
Crochet projects inspired by animals are especially popular because they add personality and warmth to handmade pieces. A crocheted kitten face step-by-step pattern is particularly loved because kittens symbolize playfulness, sweetness, and comfort. When crocheted with care, a kitten face can turn a simple item into something unique and memorable.
Another advantage of learning crocheted kitten face step-by-step techniques is that they help improve important crochet skills. While working on this project, you will practice stitches, shaping, and finishing details like eyes, ears, and whiskers. By the end of the process, you will not only have a beautiful crocheted kitten face but also stronger crochet skills.
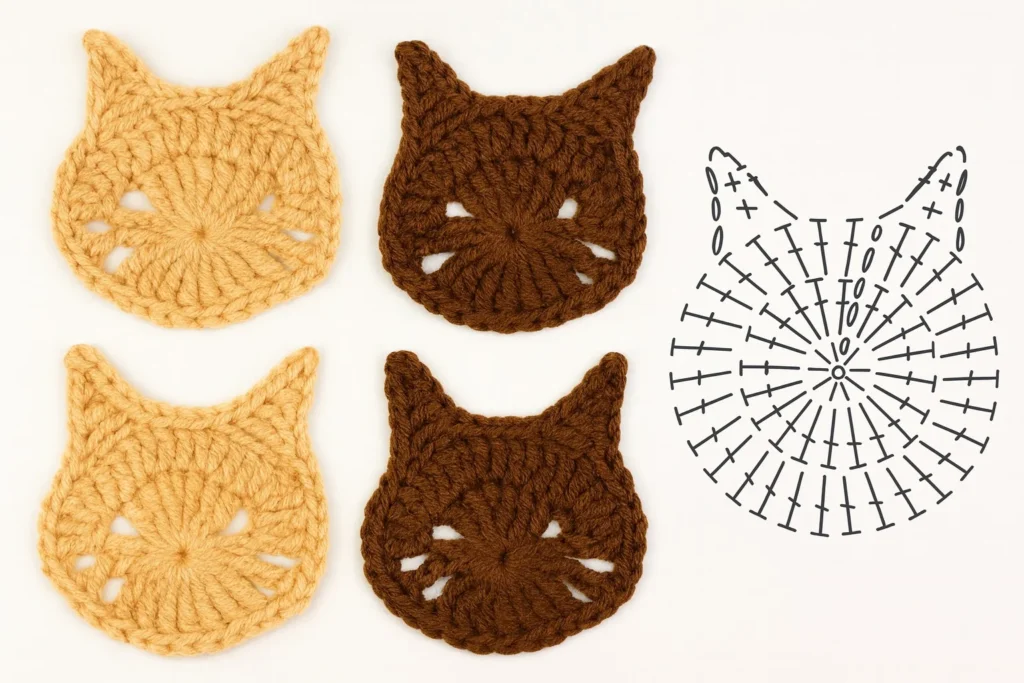
Before starting your crocheted kitten face step-by-step project, it is helpful to understand the basic structure of the design. Most crocheted kitten faces are made from simple shapes such as circles or ovals that form the base of the face. These shapes are easy to create and ideal for beginners who are still building confidence in crochet techniques.
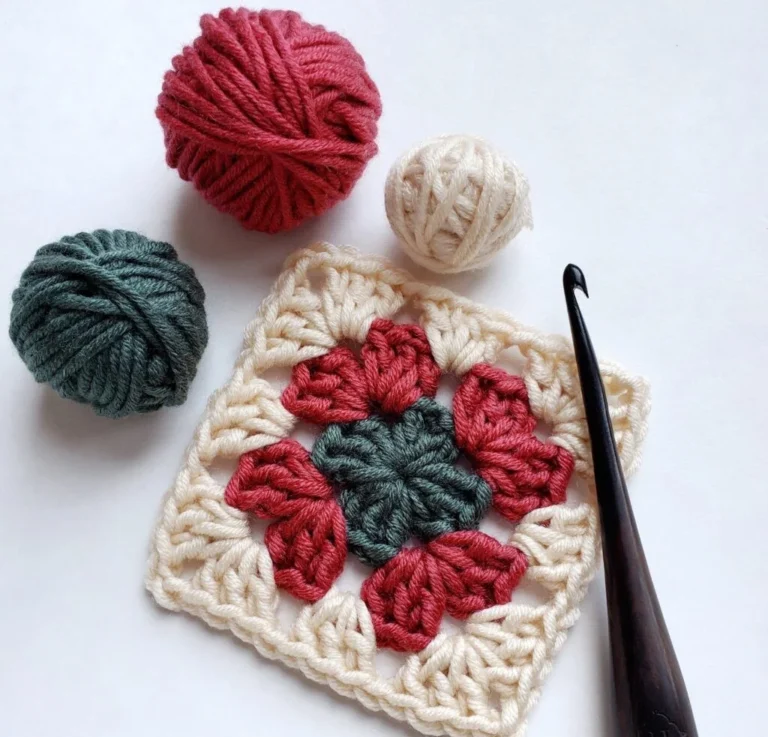
The yarn you choose will influence the final appearance of your crocheted kitten face step-by-step project. Soft cotton yarn is commonly recommended because it keeps the stitches clear and defined. However, acrylic yarn can also work well if you want something durable and easy to wash.
Selecting the correct crochet hook is equally important. Typically, small hooks are used for appliqués because they produce tight and neat stitches. A well-sized hook ensures that the crocheted kitten face step-by-step maintains its shape and does not look loose or stretched.
Another key element is color selection. Many people choose classic kitten colors such as gray, white, beige, or orange. However, creative crafters often experiment with bright or pastel colors to give their crocheted kitten face step-by-step a playful and modern look.
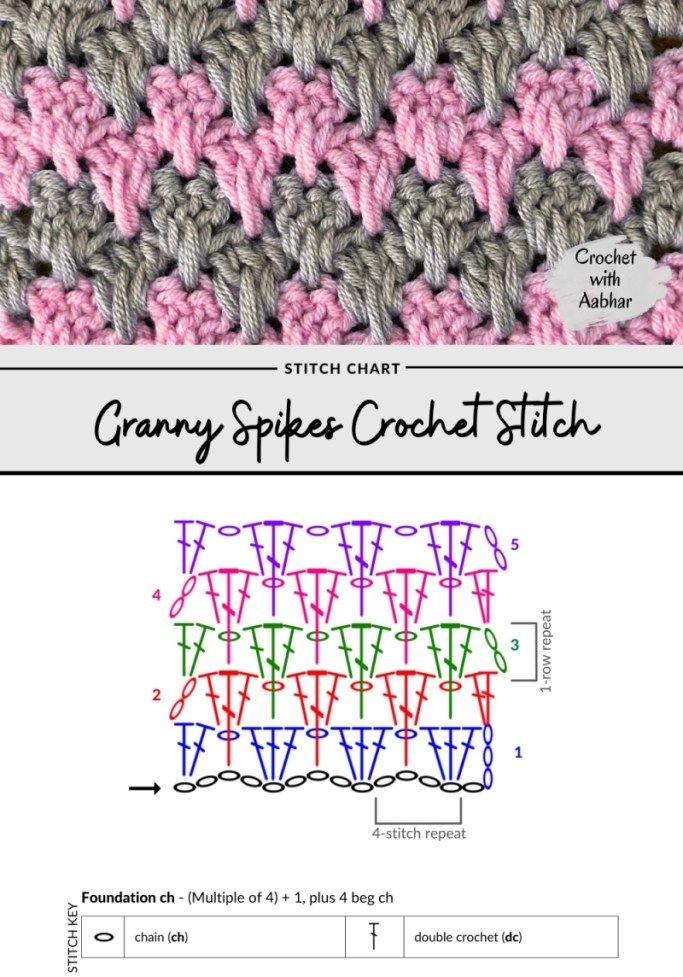
Understanding basic crochet stitches will also make the process smoother. Stitches like the single crochet, slip stitch, and increase are commonly used in a crocheted kitten face step-by-step pattern. These stitches help shape the face and add texture.
Finally, preparation is an essential part of success. Before beginning the project, make sure you have yarn, a crochet hook, scissors, and a yarn needle ready. Having everything organized will make your crocheted kitten face step-by-step experience enjoyable and stress-free.
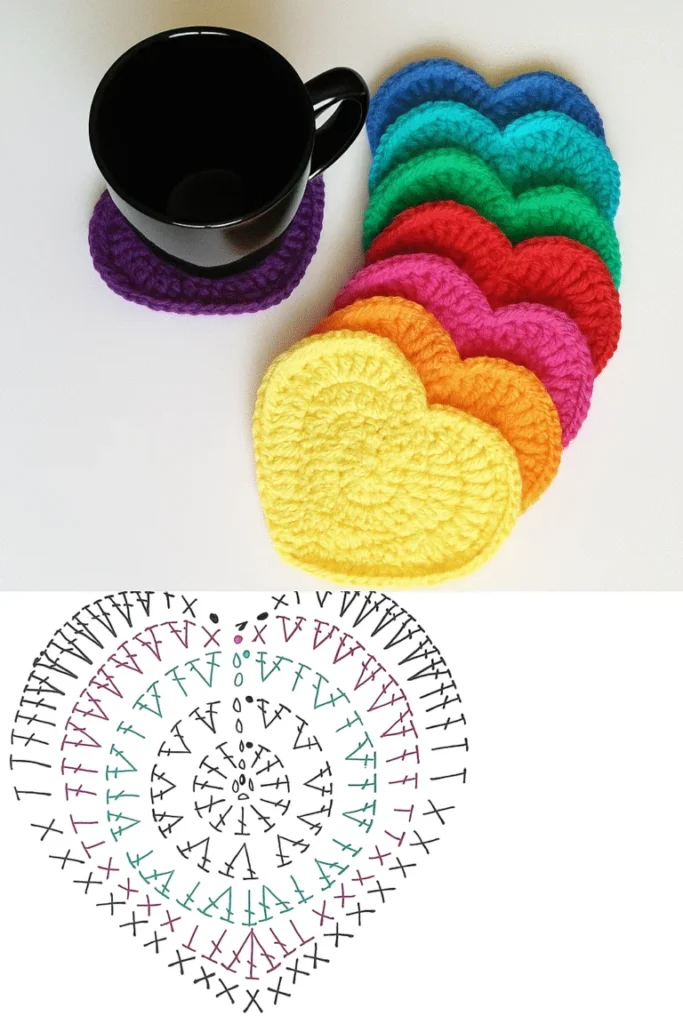
The first step in a crocheted kitten face step-by-step pattern is usually creating a circular base. This circle forms the main structure of the kitten’s face and sets the size for the entire design. Most patterns begin with a magic ring or a small chain loop.
Once the starting ring is made, the next step involves crocheting several stitches into that ring. These stitches gradually expand the circle and create the soft rounded shape typical of a kitten’s face. Consistent tension is important to keep the crocheted kitten face step-by-step symmetrical.
As you continue increasing stitches in each round, the circle becomes larger and more defined. This gradual expansion is what gives the base its smooth appearance. A well-shaped circle is the foundation of a successful crocheted kitten face step-by-step project.
After the circle reaches the desired size, many patterns include one or two rounds without increases. These rounds stabilize the structure and help the face maintain its shape over time.
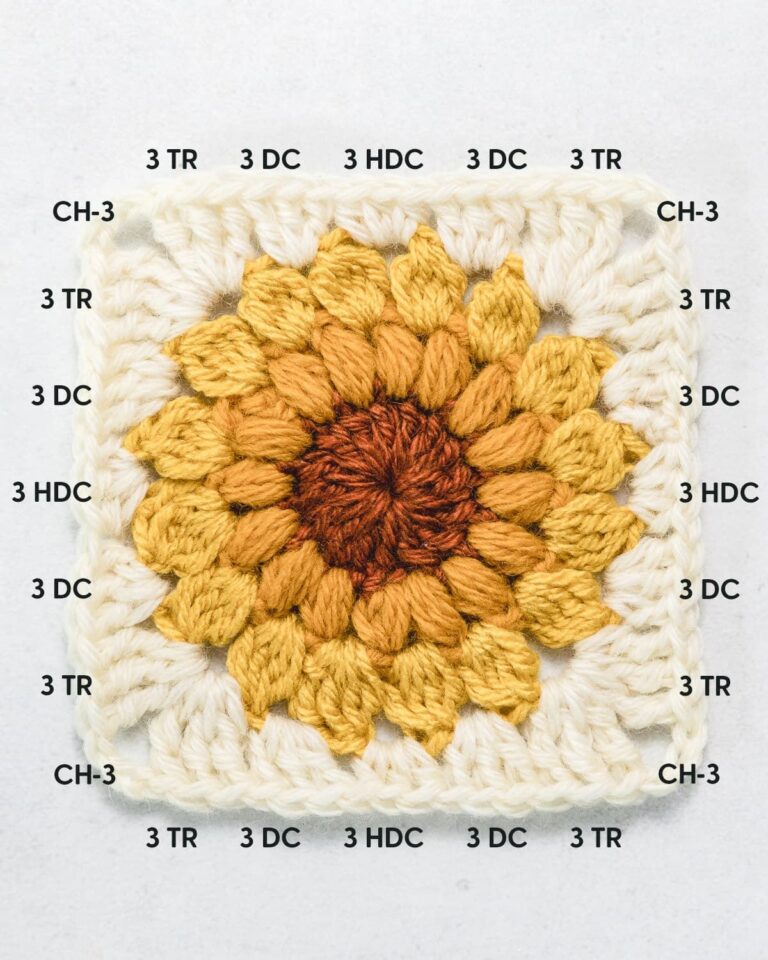
Some crocheters also choose to add subtle color changes at this stage. For example, a lighter color may be used for the center of the face to mimic the natural markings of a kitten. These small details enhance the visual appeal of the crocheted kitten face step-by-step.
Once the base is finished, fasten off the yarn carefully. At this stage, the project already resembles a simple crocheted circle, but it will soon transform into an adorable kitten face as additional features are added.
The magic of a crocheted kitten face step-by-step truly appears when the facial details are added. These features give the kitten its personality and make the design come to life.
Eyes are usually created using small pieces of black yarn or by sewing tiny safety eyes onto the crochet piece. Placement is very important because it affects the expression of the kitten. Even a slight change can make the crocheted kitten face step-by-step look playful, sleepy, or curious.
The nose is another charming detail. Many crochet patterns use a small triangle shape made with pink yarn. This small addition brings warmth and realism to the crocheted kitten face step-by-step design.
Whiskers are often made using thin strands of yarn stitched across the face. Although simple, whiskers add character and make the kitten instantly recognizable. Some crafters prefer embroidery techniques to create delicate whisker lines.
Ears are typically crocheted separately and then sewn onto the top of the face. They are often small triangles that give the kitten its iconic silhouette. The positioning of the ears plays a big role in the final look of the crocheted kitten face step-by-step.
Adding these details requires patience and careful stitching. Taking your time during this stage ensures that every feature is balanced and that the crocheted kitten face step-by-step looks polished and professional.
After completing your crocheted kitten face step-by-step, you may be surprised by how many ways it can be used. One of the most popular uses is as a crochet appliqué that can be sewn onto blankets, pillows, or clothing.
Many crafters also attach a crocheted kitten face step-by-step to baby items such as hats, bibs, or booties. The cute design adds a playful touch that parents and children love.
Another creative idea is turning the kitten face into a keychain or small decoration. By attaching a ring or clip, the crocheted kitten face step-by-step can become a charming accessory for bags or backpacks.
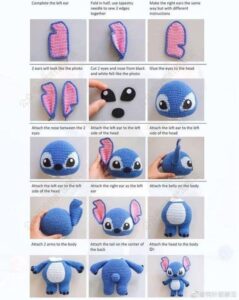
Some crocheters incorporate the kitten face into larger amigurumi projects. For example, the face can be used as the front of a crocheted toy or stuffed animal.
Handmade gifts are another wonderful option. A carefully crafted crocheted kitten face step-by-step can be added to greeting cards, gift bags, or handmade wall decorations.
Finally, many people enjoy selling crochet creations at craft fairs or online markets. A well-made crocheted kitten face step-by-step can become a popular handmade item because of its universal appeal and adorable design.
Is a crocheted kitten face step-by-step suitable for beginners?
Yes. Most crocheted kitten face step-by-step patterns are beginner-friendly because they use basic stitches and simple shapes like circles and triangles.
What yarn works best for a crocheted kitten face step-by-step?
Cotton yarn is often recommended because it creates clean stitches and keeps the shape well. However, acrylic yarn is also widely used and easy to maintain.
How long does it take to make a crocheted kitten face?
Depending on experience level, a crocheted kitten face step-by-step project can take anywhere from 30 minutes to a few hours.
Can I customize the design?
Absolutely. You can experiment with colors, embroidery styles, and facial expressions to make your crocheted kitten face step-by-step unique.
What can I attach a crocheted kitten face to?
It can be attached to blankets, clothing, bags, hats, pillows, and many other handmade items.
Do I need advanced crochet skills?
No. Basic knowledge of stitches like single crochet and slip stitch is usually enough to complete a crocheted kitten face step-by-step.
Learning how to create a crocheted kitten face step-by-step is a fun and rewarding experience for anyone who enjoys crochet. In this guide, we explored the essential steps, from understanding the basic structure of the face to creating the circular base and adding charming details like eyes, ears, and whiskers. Each stage helps transform simple yarn into a beautiful handmade design.
We also discovered how versatile this project can be. A crocheted kitten face step-by-step can decorate clothing, accessories, home décor, or even become a thoughtful handmade gift. With creativity and practice, the possibilities are almost endless.
Now it’s your turn. Try creating your own crocheted kitten face step-by-step and experiment with different colors and styles. If you enjoyed this guide, feel free to share your honest opinion and leave suggestions about what crochet topics you would like to learn next. Your feedback helps inspire new ideas and creative projects.


