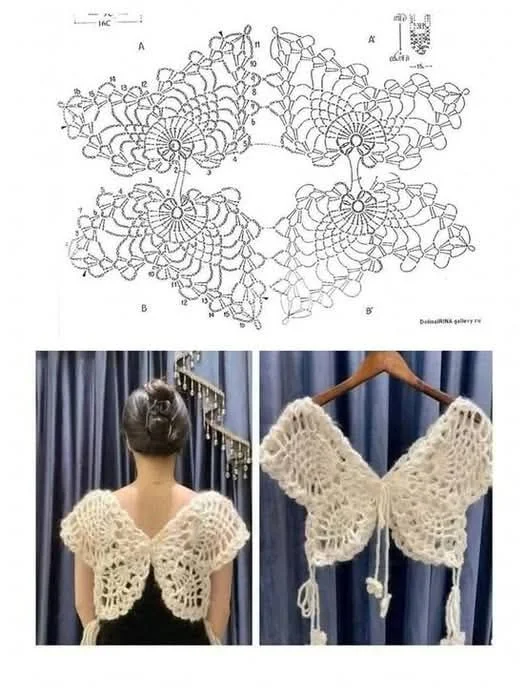
How to Make a Beautiful Butterfly Cropped Top in Crochet

How to Crochet a Daisy Pattern is one of the most searched topics among beginners and experienced crafters who want to create delicate, charming floral designs using yarn. This timeless motif is versatile, beginner-friendly, and perfect for adding a handmade touch to blankets, bags, garments, and home décor. Whether you are just starting your crochet journey or looking to refine your technique, learning How to Crochet a Daisy Pattern can open the door to endless creative possibilities.
Crochet flowers have always held a special place in the crafting world because they combine simplicity with elegance. The daisy, in particular, symbolizes freshness and joy, making it a favorite motif in seasonal projects and decorative accents. When you understand How to Crochet a Daisy Pattern, you gain a foundational skill that can be adapted to countless variations in size, texture, and color combinations. From soft pastel petals to bold, vibrant designs, the daisy can match any creative vision.
In this complete guide on How to Crochet a Daisy Pattern, you will learn about essential materials, step-by-step techniques, finishing methods, and creative applications. The article is structured to help you build confidence gradually, even if you have never crocheted a flower before. By the end, you will not only know How to Crochet a Daisy Pattern, but you will also understand how to customize it and integrate it into larger crochet projects.

Before learning How to Crochet a Daisy Pattern, it is important to gather the right materials. You will need yarn in at least two colors: one for the center of the daisy and one for the petals. Cotton yarn is often recommended for beginners because it provides excellent stitch definition and holds its shape well. However, acrylic yarn is also a good choice if you are looking for softness and affordability.
Selecting the right hook size is equally important when mastering How to Crochet a Daisy Pattern. The hook size should correspond to the yarn weight indicated on the yarn label. Using the recommended hook size ensures your stitches are even and your petals maintain a balanced shape. If you want a tighter and more structured flower, you can use a slightly smaller hook.
Other helpful tools include scissors, a yarn needle for weaving in ends, and stitch markers. Although not mandatory, stitch markers can make the process smoother, especially when working in rounds. Understanding how to properly prepare your workspace and materials will make learning How to Crochet a Daisy Pattern more enjoyable and efficient.
You should also be familiar with basic crochet stitches. These typically include chain (ch), slip stitch (sl st), single crochet (sc), and double crochet (dc). If you are new to crochet, practicing these stitches beforehand will make it easier to follow the instructions for How to Crochet a Daisy Pattern.
Tension plays a key role in achieving a neat and consistent result. Keep your grip relaxed but controlled to avoid overly tight or loose stitches. Even tension ensures that the daisy center lays flat and the petals are evenly spaced.
Finally, choose a comfortable and well-lit space for crocheting. Good lighting helps you see each stitch clearly, which is especially important when working with smaller yarn or intricate patterns. Proper preparation sets the foundation for successfully learning How to Crochet a Daisy Pattern.
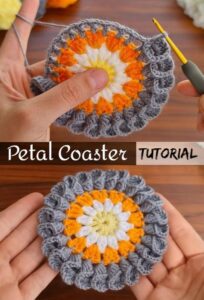
To begin understanding How to Crochet a Daisy Pattern, start with the center of the flower. Using your chosen center color, create a magic ring or chain four stitches and join with a slip stitch to form a circle. This forms the base upon which the petals will be built.
Next, work single crochet stitches into the center ring. Typically, crocheting 8 to 12 single crochets into the ring creates a well-balanced center. Once completed, join the round with a slip stitch to the first stitch. This completes the central portion of How to Crochet a Daisy Pattern.
Now, switch to your petal color. Attach the new yarn with a slip stitch in any stitch around the center. To form a petal, you may chain two or three stitches, then work double crochets into the same stitch. The number of double crochets determines the fullness of each petal.
After completing the double crochets for one petal, chain two and slip stitch into the next stitch from the center round. Repeat this sequence around the circle. As you continue, you will see the petals forming evenly around the center, which is the most exciting part of learning How to Crochet a Daisy Pattern.
Make sure each petal is similar in size by maintaining consistent stitch height and tension. If one petal looks uneven, gently pull it out and redo it. Crochet allows flexibility, and practice improves uniformity.
Once all petals are complete, fasten off the yarn and weave in the loose ends using a yarn needle. Properly securing and hiding the ends gives your daisy a clean, professional appearance. At this point, you have successfully completed the core process of How to Crochet a Daisy Pattern.
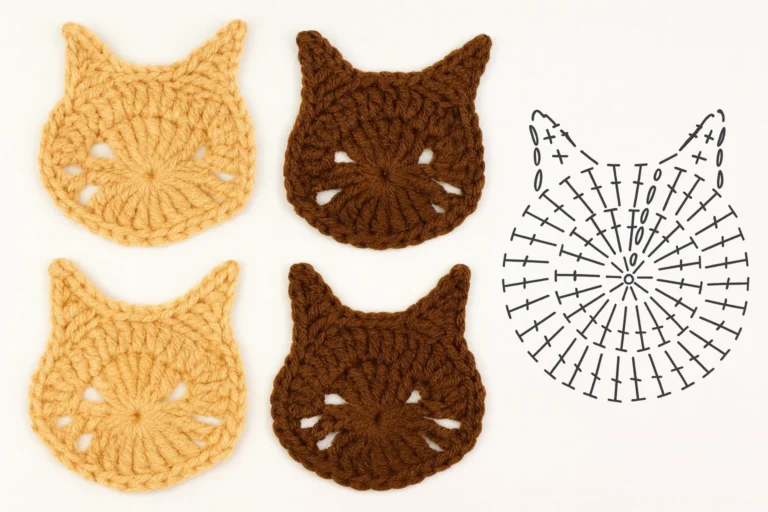
One of the joys of mastering How to Crochet a Daisy Pattern is the ability to personalize it. You can experiment with different yarn textures such as chunky yarn for oversized daisies or fine thread for delicate appliqués. Each variation produces a unique effect.
Color combinations offer endless creative options. Traditional daisies feature white petals and a yellow center, but you can explore pastel palettes, rainbow gradients, or even monochromatic schemes. Customizing colors allows your How to Crochet a Daisy Pattern project to match specific themes or décor styles.
You can also adjust the size of the flower by modifying the number of stitches in the center or the height of the petal stitches. Adding more stitches to the center creates additional petals, resulting in a fuller flower. Increasing the stitch height from double crochet to treble crochet makes longer petals.
Texture can be enhanced by layering petals. After completing the first round of petals, you can attach a new round behind the first one. This layered approach adds dimension and makes your How to Crochet a Daisy Pattern more visually striking.
Another customization idea involves incorporating beads or embroidery details in the center. Adding a small bead cluster can create a realistic pollen effect, while embroidered lines on petals add depth.
Blocking your finished daisy is also beneficial. Lightly dampen the flower and shape it on a flat surface, allowing it to dry completely. Blocking helps define petal edges and ensures your How to Crochet a Daisy Pattern looks polished and symmetrical.
After learning How to Crochet a Daisy Pattern, the next step is exploring how to use it creatively. One popular option is sewing multiple daisies together to create a floral blanket or decorative throw. This technique adds texture and charm to any living space.
Crochet daisies also work beautifully as appliqués. You can attach them to hats, scarves, tote bags, or even baby clothing. The soft floral detail enhances handmade items and gives them a cheerful touch.
Another creative use is incorporating daisies into granny squares. By placing a daisy in the center of a square, you can combine classic crochet techniques with floral elegance. This approach is ideal for larger projects like quilts and bedspreads.
Home décor enthusiasts often use crochet daisies for garlands. String several daisies together to create a decorative banner for parties, seasonal celebrations, or bedroom accents. This is a simple yet impactful way to apply your knowledge of How to Crochet a Daisy Pattern.
Crochet flowers can also be used in handmade gifts. Attaching a daisy to a greeting card, wrapping, or hair accessory adds a thoughtful, personalized touch. These small details make handcrafted gifts more meaningful.
Finally, consider using your daisies in wall art. Mount them onto canvas or incorporate them into embroidery hoops for a textured display. This modern twist demonstrates how versatile mastering How to Crochet a Daisy Pattern can truly be.
What is the easiest way to start learning How to Crochet a Daisy Pattern?
The easiest way is to practice basic crochet stitches first, then follow a simple pattern using a magic ring and double crochet petals. Start with medium-weight yarn and a comfortable hook size.
How long does it take to crochet a daisy?
For beginners, it may take 20 to 30 minutes to complete one daisy. With practice, you can finish one in under 10 minutes.
Can beginners successfully learn How to Crochet a Daisy Pattern?
Yes, absolutely. The pattern is beginner-friendly as long as you understand foundational stitches like chain, single crochet, and double crochet.
What type of yarn works best?
Cotton yarn is excellent for structure and definition, while acrylic yarn provides softness and flexibility. The best choice depends on your project goals.
Why does my daisy curl or not lay flat?
Curling usually happens due to tight tension or too many stitches in the center. Adjusting your tension or reducing stitch count can help.
How can I make my petals fuller?
You can increase the number of double crochets per petal or use taller stitches such as treble crochet for added volume.
Learning How to Crochet a Daisy Pattern is a rewarding and creative experience that combines simple techniques with beautiful results. In this guide, you discovered the essential materials, step-by-step instructions, customization ideas, and creative ways to use your finished daisies. By understanding tension, stitch selection, and finishing techniques, you can confidently create polished floral motifs for a wide range of projects.
Now that you know How to Crochet a Daisy Pattern, it is time to pick up your hook and start experimenting with colors and textures. Practice regularly, try new variations, and let your creativity blossom. If you found this guide helpful, please leave your honest opinion and share your suggestions. Your feedback helps improve future tutorials and inspires more creative crochet journeys.