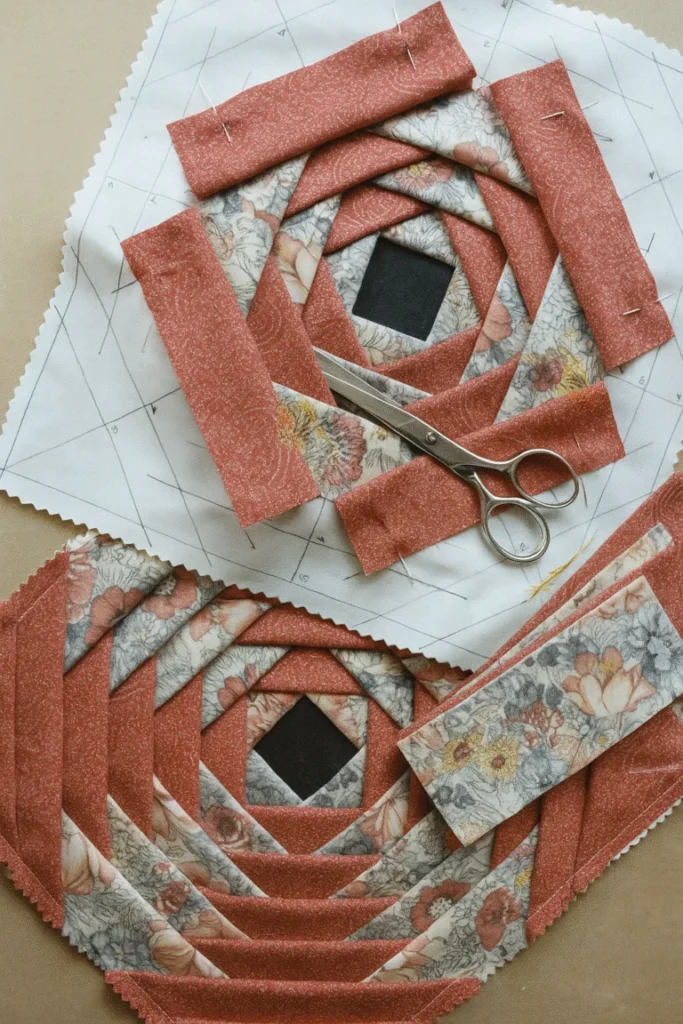
The Best and Most Practical Pineapple Block Pattern

Bird Quilt Pattern Tutorial is the perfect starting point for anyone who dreams of stitching delicate wings, charming feathers, and nature-inspired beauty into fabric. Whether you are a beginner exploring your first quilt block or an experienced quilter looking for fresh inspiration, this comprehensive guide will walk you through every essential step. In this article, you will learn how to plan, design, cut, assemble, and finish a bird-themed quilt with confidence and creativity.
Quilting has always been a meaningful craft, blending tradition with artistic expression. A Bird Quilt Pattern Tutorial not only teaches technical skills but also encourages creativity, storytelling, and personalization. Birds symbolize freedom, hope, and joy, making them a beloved motif in quilting projects. From simple appliqué silhouettes to intricate patchwork birds, there are endless possibilities to explore in your next project.
This guide is carefully structured to provide clear, step-by-step explanations while remaining engaging and easy to follow. You will find helpful techniques, fabric tips, and design ideas that align with modern quilting trends and timeless craftsmanship. By the end of this Bird Quilt Pattern Tutorial, you will feel equipped to create a beautiful quilt that reflects your personal style and passion for sewing.
Before diving into fabric and thread, it’s important to understand what a Bird Quilt Pattern Tutorial truly involves. At its core, it is a structured guide that explains how to create a quilt featuring bird motifs, either through patchwork, appliqué, or a combination of both techniques. Knowing the fundamentals helps ensure that your final piece is both beautiful and durable.
A bird quilt pattern usually includes a detailed template or block design. These templates guide the shape of the bird’s body, wings, beak, and tail. In a well-designed Bird Quilt Pattern Tutorial, measurements are clearly defined to help quilters maintain consistent sizing throughout the project. Precision at this stage ensures that all blocks align properly when assembled.
Fabric selection plays a critical role in the success of your quilt. Cotton fabrics are often preferred because they are easy to cut, sew, and press. Choosing complementary colors can bring your bird design to life, while contrasting backgrounds make the bird stand out visually. A thoughtful color palette enhances the overall aesthetic of the quilt.
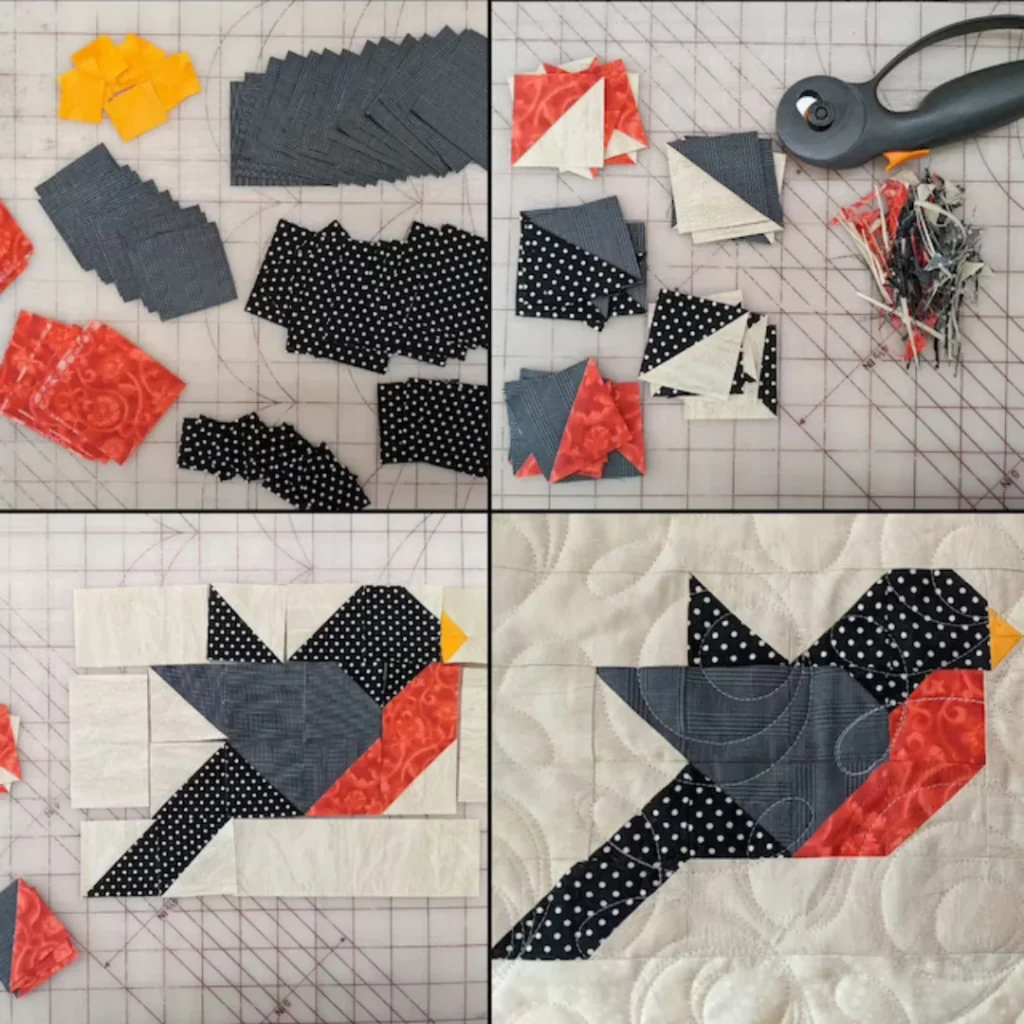
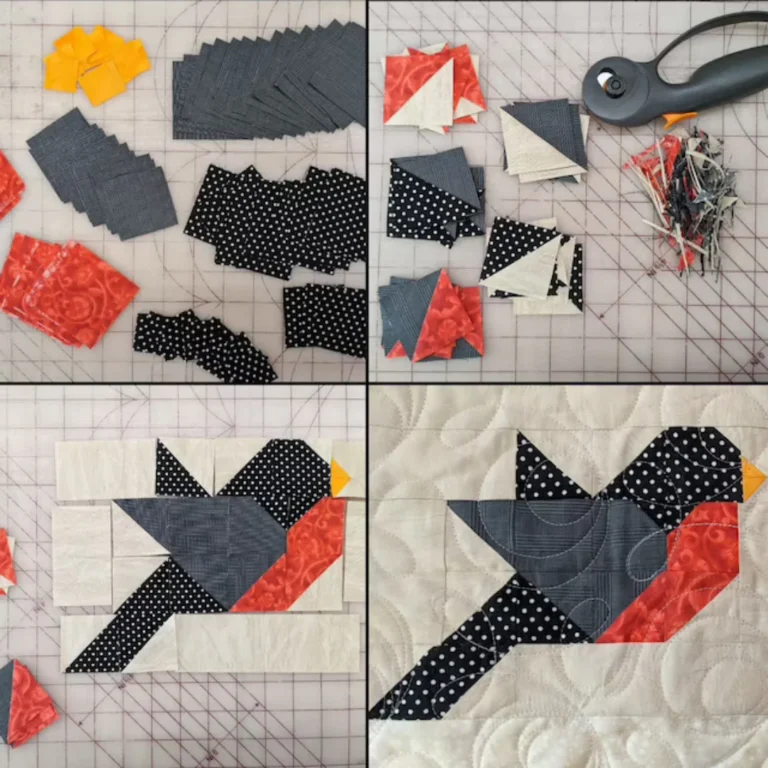
Another important aspect is understanding quilting tools. A rotary cutter, quilting ruler, cutting mat, and high-quality thread are essential for accurate results. Beginners following a Bird Quilt Pattern Tutorial should invest in reliable tools to improve efficiency and precision during the cutting and piecing stages.
Seam allowance is a technical detail that cannot be overlooked. Most quilt patterns recommend a quarter-inch seam allowance. Consistency here prevents misalignment when assembling blocks. Even a small deviation can affect the final layout of your bird quilt.
Finally, reading through the entire pattern before starting is crucial. Many quilters skip this step and encounter avoidable mistakes. A complete understanding of the instructions ensures smoother progress and greater confidence throughout your quilting journey.
Fabric preparation is the foundation of any successful Bird Quilt Pattern Tutorial project. Pre-washing your fabrics helps prevent shrinkage and color bleeding after the quilt is completed. While some quilters prefer working with unwashed fabric for stiffness, washing is generally recommended for long-term durability.
When selecting fabrics for your bird motif, consider texture and print scale. Small prints work beautifully for wings and smaller details, while solid fabrics can define the bird’s silhouette clearly. Mixing florals, geometric prints, and subtle textures adds visual depth and personality to your quilt.
Color coordination is another important factor. Earthy tones create a natural look, while bright hues can give your bird quilt a playful and modern appearance. Using a color wheel can help you choose harmonious combinations that elevate the overall design.
Cutting accuracy greatly influences the final result. Use a sharp rotary cutter and align fabric carefully on your cutting mat. In a Bird Quilt Pattern Tutorial, precise cutting ensures that pieces fit together seamlessly without puckering or distortion.
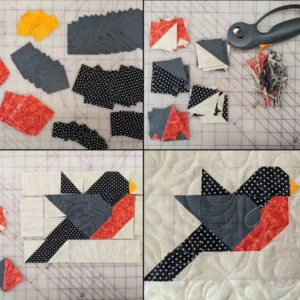
Organizing your pieces before sewing saves time and reduces confusion. Lay out the bird components in order and double-check placement before stitching. This step is especially important for more detailed patterns that include layered wings or multiple fabric sections.
Pressing techniques also matter. Press seams open or to one side according to the pattern instructions. Proper pressing helps maintain flat blocks and makes the final quilt top easier to assemble and quilt. Skipping this step can lead to uneven results.
The heart of any Bird Quilt Pattern Tutorial lies in assembling the bird block. Start by sewing smaller components together, such as wing sections or body segments. Working in stages helps maintain control and ensures greater accuracy.
Use pins or clips to hold pieces in place before stitching. This prevents shifting and keeps edges aligned. Especially when sewing curved appliqué shapes, careful positioning is key to achieving smooth outlines.
Maintain a steady sewing speed to keep seams straight. Rushing can cause uneven stitching or misaligned edges. Take your time and focus on consistent seam allowances for professional-looking results.
Once individual sections are complete, join them together to form the full bird shape. Check alignment at each stage. A high-quality Bird Quilt Pattern Tutorial encourages checking measurements frequently to avoid cumulative errors.
After completing the bird block, square it up using a quilting ruler. Trim excess fabric carefully, ensuring that the block matches the required dimensions. This step prepares your block for seamless integration into the quilt top layout.
Repeat the process for additional bird blocks if your quilt design includes multiple birds. Consistency across blocks creates visual harmony and enhances the overall impact of your finished quilt.
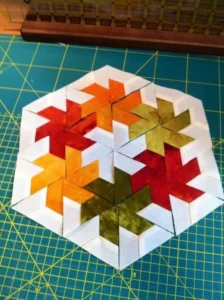
After assembling all blocks, arrange them according to your chosen layout. Step back and evaluate spacing, balance, and color distribution. A thoughtful arrangement enhances the storytelling aspect of your Bird Quilt Pattern Tutorial project.
Sew blocks together row by row, pressing seams carefully as you go. Align corners and intersections precisely to maintain a polished look. Small details make a significant difference in the final presentation.
Next comes layering. Place the quilt top over batting and backing fabric, smoothing out wrinkles. Secure layers with safety pins or basting spray before quilting. Proper basting prevents shifting during stitching.
Quilting designs can be simple or intricate. Straight-line quilting provides a clean, modern finish, while free-motion quilting allows you to add feather or swirl patterns that complement the bird motif. Choose a style that suits your skill level and aesthetic preferences.
Binding is the final structural step. Attach binding strips around the quilt edges to enclose raw seams. Neatly stitched binding gives your quilt a professional appearance and ensures durability.
Finally, add any decorative embellishments, such as embroidered details for eyes or textured stitching for feathers. These small additions personalize your quilt and reflect the creative spirit behind your Bird Quilt Pattern Tutorial journey.
1. Is a Bird Quilt Pattern Tutorial suitable for beginners?
Yes, many bird quilt patterns are beginner-friendly. Start with simple appliqué shapes and basic patchwork blocks before progressing to more detailed designs.
2. What fabric works best for bird quilt projects?
High-quality quilting cotton is the most recommended fabric. It is easy to cut, sew, and press, making it ideal for both beginners and experienced quilters.
3. How long does it take to complete a bird quilt?
The timeline depends on size and complexity. A small wall hanging may take a few days, while a full-size quilt can take several weeks.
4. Can I customize my Bird Quilt Pattern Tutorial design?
Absolutely. You can adjust colors, add embroidery, or modify block layouts to reflect your personal style and creativity.
5. Do I need special tools for quilting birds?
Basic quilting tools such as a rotary cutter, ruler, sewing machine, and iron are sufficient. Advanced designs may require additional appliqué tools.
6. How do I care for a finished bird quilt?
Wash gently in cold water and air dry or tumble dry on low. Proper care ensures your quilt remains vibrant and durable for years.
Throughout this comprehensive Bird Quilt Pattern Tutorial, we explored every essential stage of creating a bird-themed quilt. From understanding pattern basics and selecting fabrics to assembling blocks and adding final touches, each step contributes to a successful and satisfying quilting experience. By following structured techniques, maintaining precision, and embracing creativity, you can craft a quilt that is both meaningful and visually stunning.
Now it’s your turn to bring your bird quilt to life. Did you enjoy this tutorial? Share your honest opinion and suggestions. Your feedback is valuable and helps inspire even more creative quilting ideas for the future.
